Nowadays, programs need the latest updates, new content, or configurations, and BITS intelligently handles network interruptions even after a reboot by pausing and resuming transfers. The ‘intelligent’ in BITS also increases or decreases the file transfer rate based on the idle network bandwidth available. Its app-specified transfer policies ensure that if a network app is consuming more bandwidth, its transfer rate is reduced to prevent the files from transferring on expensive networks. It also offers an easy way of downloading files to install updates on Windows 10. This way, even after you exit from an application, BITS will still transfer files provided you’re still logged on, and the network connection is maintained. If you log off and log back in, BITS will resume the transfers once the connection is reestablished. But that’s not all. From the May 2019 Update, BITS will now mind power usage and transfer files when the machine is plugged in, and when it’s in Modern Standby mode. In short, it ensures uploads and downloads between your device and the remote server continue without any impact on the network experience. It’s particularly useful for applications that need to upload files to or download from HTTP or REST web server or SMB file servers, mind network costs, resume file transfers automatically after restarts or disconnections, or preserve responsiveness of other network apps. As much as BITS may be an intelligent service, sometimes it may not start or may suddenly stop working altogether. The result of this is that other services like Microsoft Store or Windows Update won’t work properly. We’re going to show you different ways you can troubleshoot and fix BITS when it won’t start.
Fix Background Intelligent Transfer Service Is Not Working
Restart the Background Intelligent Transfer ServiceScan your device for malwareUse the BITS TroubleshooterUse the SFC and DISM command line toolTemporarily disable security softwareInstall the latest quality update from Microsoft UpdateEnable the Network Location Awareness and Network List servicesChange Startup selection setting to Normal startupEdit the RegistryReset your computer
Note: The instructions in this guide are focused on the Windows 10 operating system.
Restart The Background Intelligent Transfer Service
Normally, BITS starts automatically with your computer at startup, but if it doesn’t, you can manually check and restart the service.
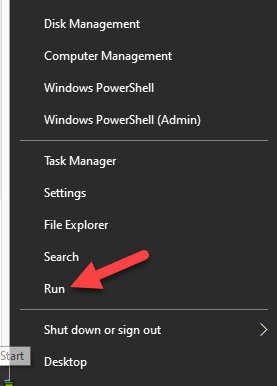
- Right-click Start>Run.
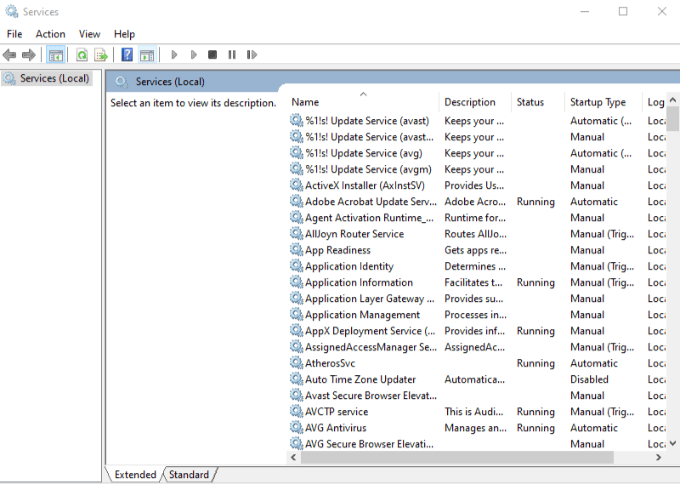
- Type services.msc in the Run box, and then press Enter to open Windows Services.
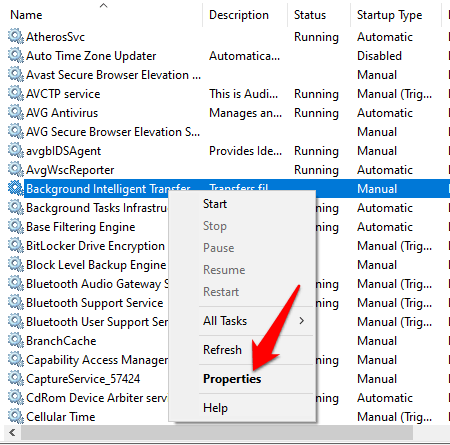
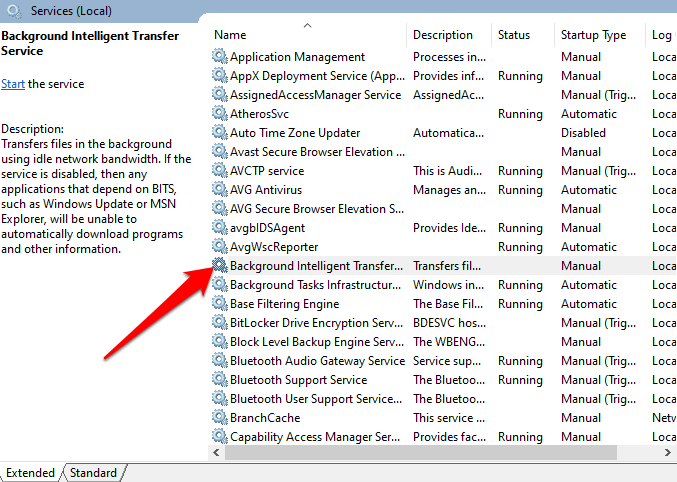
- Find Background Intelligent Transfer Service from the list of services on the right.
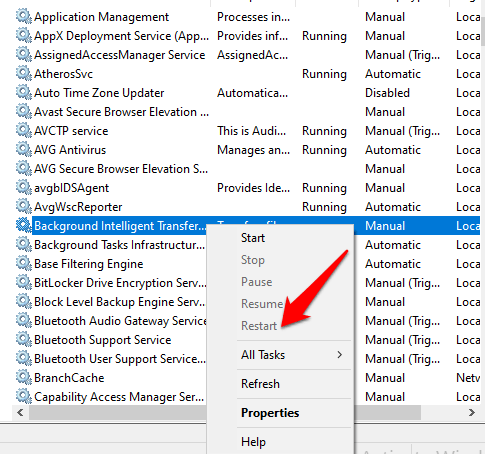
- If BITS is running, right-click and select Restart to restart the service and fix it wherever it may have got stuck for one reason or another.
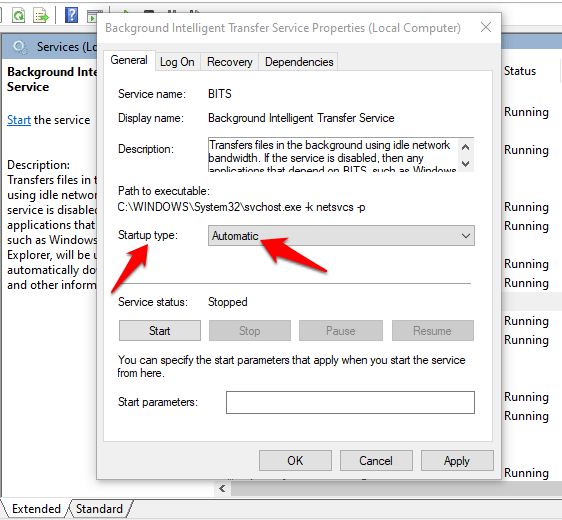
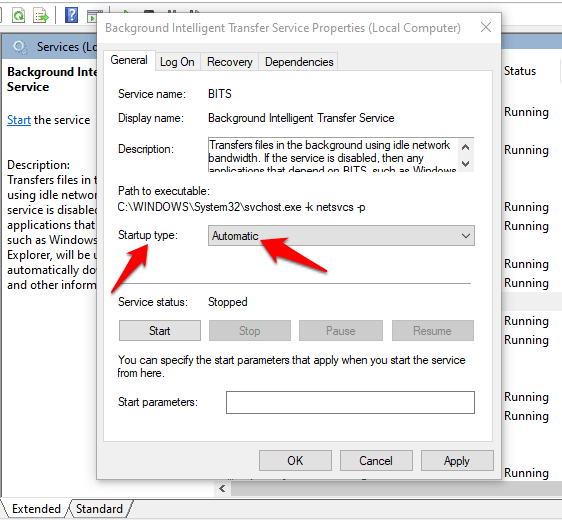
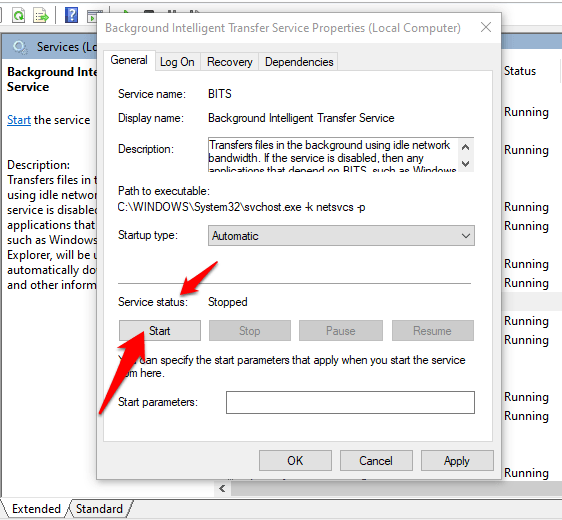
- If BITS doesn’t start, double-click on the entry in Windows Services, and change the startup type in the new popup to Automatic.
- Next to Service Status, click the Start button and see if BITS works normally again.
Scan Your Device For Malware
Viruses and malware often target BITS to prevent it from starting normally. If it won’t start, run a malware or virus scan to ensure nothing is hindering BITS from providing the right communication between your device and other BITS-based networks. If you have good antivirus security software installed, you can use it, otherwise try some of the best antimalware software like Malwarebytes to run the scan, and then restart your computer to see if the BITS issue is gone.
Use The BITS Troubleshooter
The BITS troubleshooter can fix most common problems with the service in Windows 10.
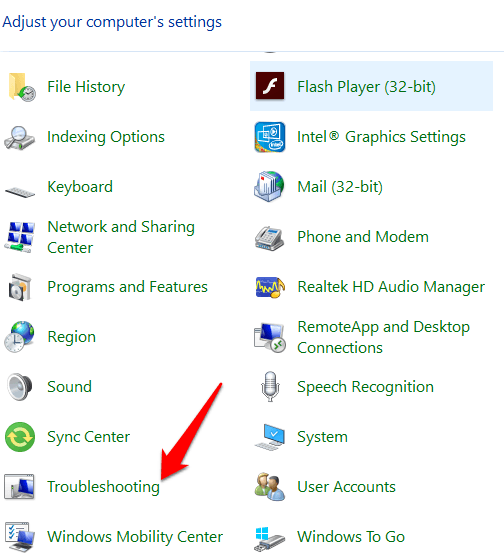
- To do this, open Control Panel and click on the View by menu at the upper right side. Click Large Icons.
- Click Troubleshooting in the list of options.
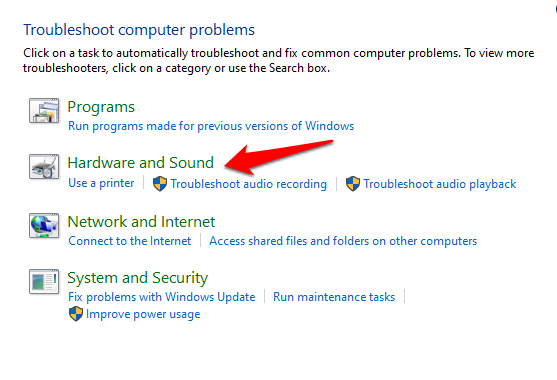
- Click Hardware and Sound.
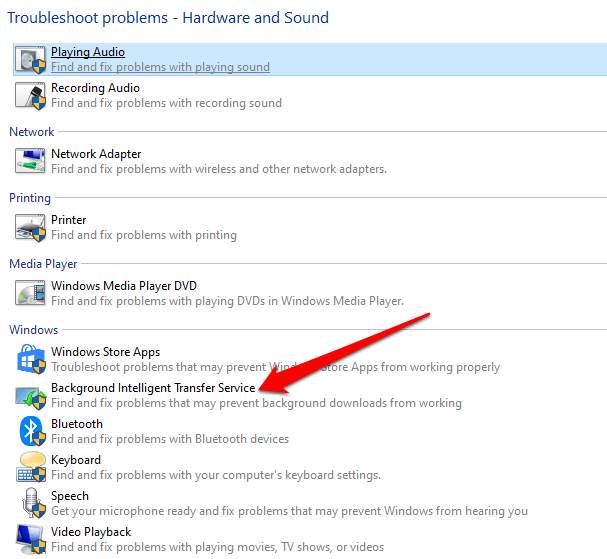
- Next, click Background Intelligent Transfer Service troubleshooter under the Windows section.
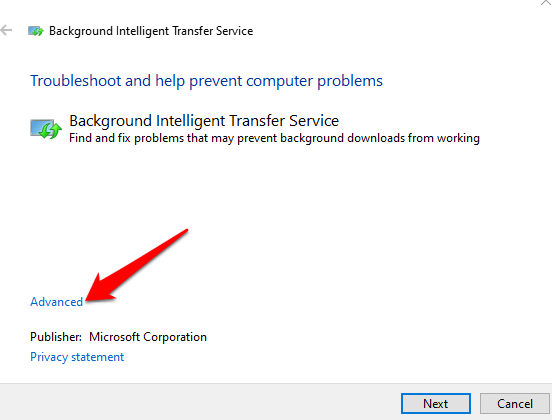
- Click Advanced.
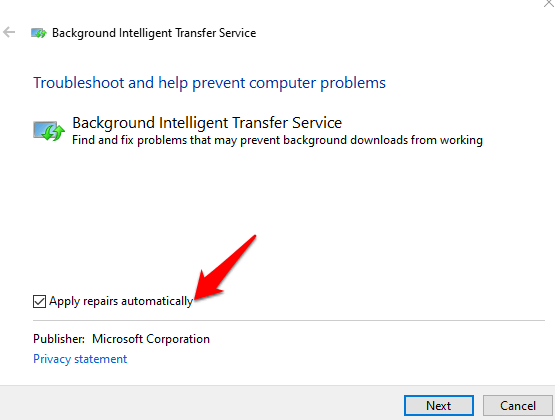
- Select Apply Repairs Automatically > Next.
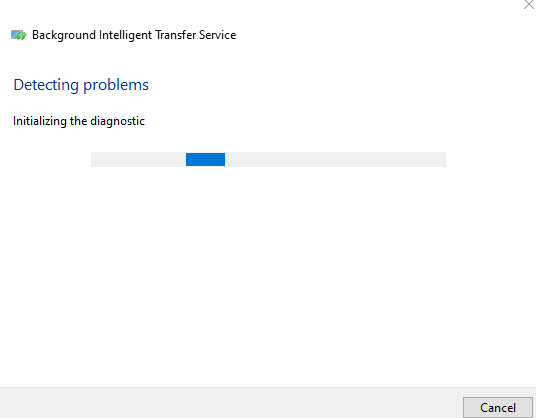
- The BITS troubleshooter will begin scanning, detecting and fixing any issues that may prevent it from starting or working properly.
Use The SFC & DISM Command Line Tool
If BITS still won’t start, you can use the System File Checker (SFC) and DISM command line tool to resolve the issue.
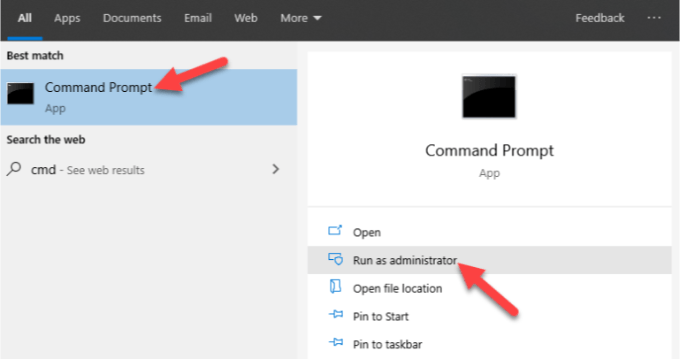
- On the search bar, type CMD to open the Command Prompt menu, and click Run as administrator.
- In the Command Prompt window, type this command and press Enter: dism /Online /Cleanup-Image /RestoreHealth. This will scan and repair any system file corruption.
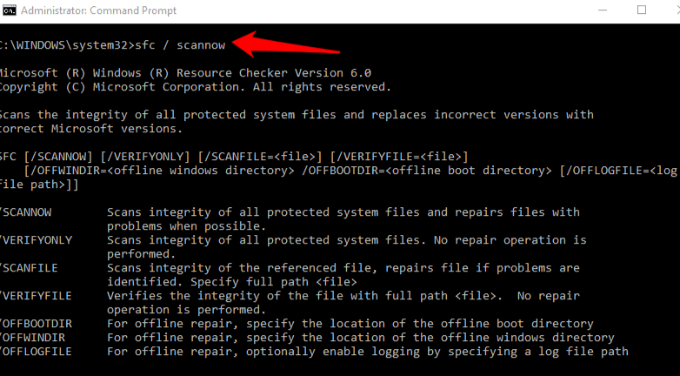
- Next, type this command and press Enter: sfc / scannow. You could also try the check disk command to see if it helps. In the same Command Prompt window, type chkdsk /r /f and press Enter.
- Restart your device, and it’ll be scanned for errors while correcting any underlying ones that cause BITS not to start or work properly.
Temporarily Disable Security Software
This is a temporary measure to help you check whether it’s causing BITS not to start. Your security software protects your device from security threats like viruses and malware, and shouldn’t be disabled. However, in this case, temporarily disable it and see if BITS starts normally. If so, your antivirus may be the cause. Otherwise, re-enable your security software as soon as you’re done.
Install The Latest Quality Update From Microsoft Update
If none of the fixes have worked so far, the problem could be with the operating system, and this can be resolved by downloading the latest Microsoft updates.
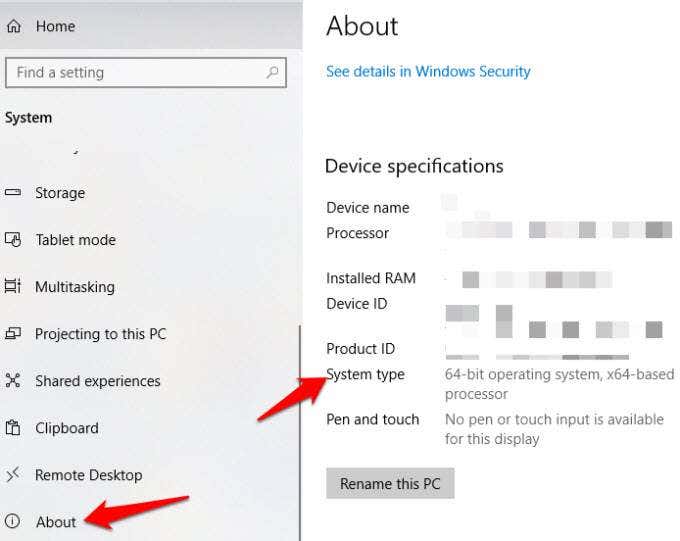
- You can do this manually, but check the KB reference (knowledge base) name from the Windows 10 Update History, and then confirm if you need a 32-bit or 64-bit update version by going to Settings>System>About and checking System Type.
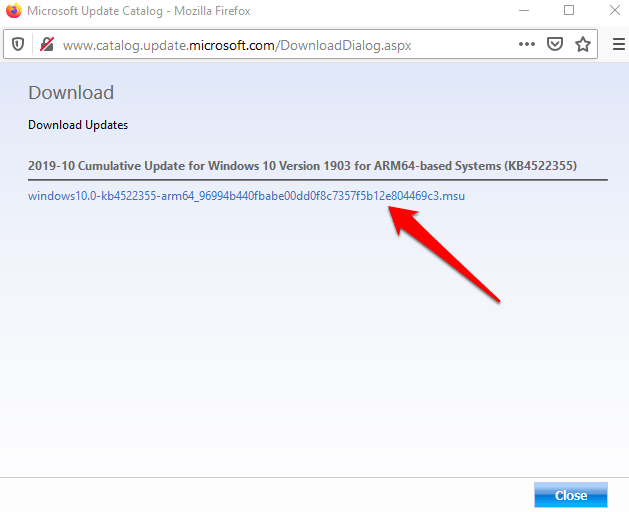
- Download the Windows Update from the Microsoft Update catalog. Here, you can search for the KB reference for the update and click Download for either 32 or 64-bit version. Click the .msu link to download the file.
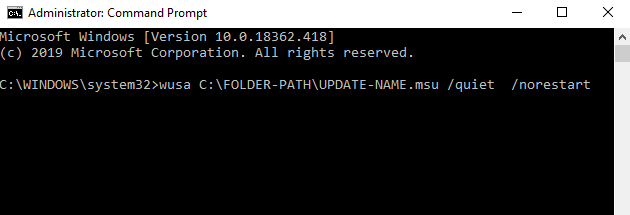
- Double click the .msu file, or go to Command Prompt>Run as administrator and type the command: wusa C:\FOLDER-PATH\UPDATE-NAME.msu /quiet /norestart and press Enter.
- Restart your computer and see if the service works fine again.
Enable The Network Location Awareness & Network List Services
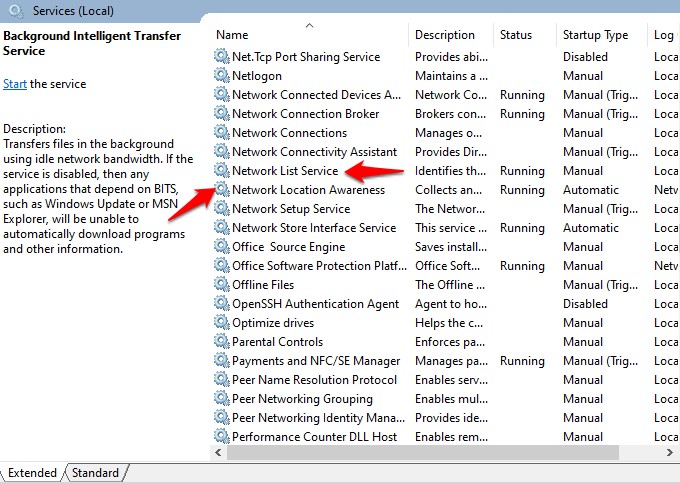
Windows Services depend on each other, but there are two particular services that aren’t listed in Windows Services when you click BITS, yet it’ll only start when these two run properly – the Network Location Awareness and Network List services.
- To enable them, right-click Start>Run and type services.msc and then press Enter.
- In Windows Services, find the Network Location Awareness and Network List services and right click on each to start them using the startup type steps we described for BITS above. If each service is started, leave it as is, but if each shows ‘stopped’, click on the Start button to restart the service. Set up all startup settings for each of these services to Automatic, including BITS.
Change Startup Selection Setting To Normal startup
The default startup selection setting should be Normal or Selective startup depending on your computer.
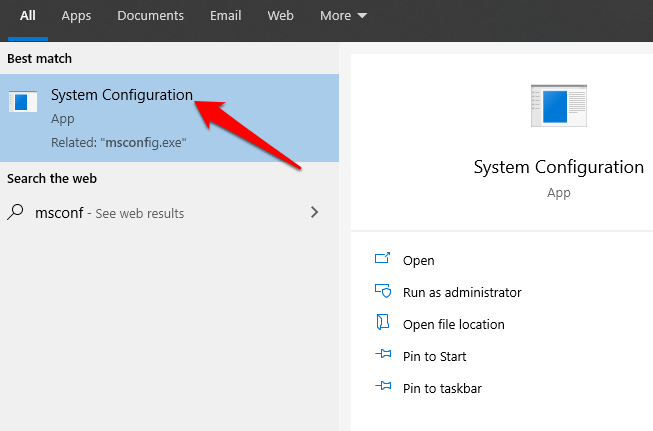
- To change it, right-click Start>Run and type msconfig. Click System Configuration.
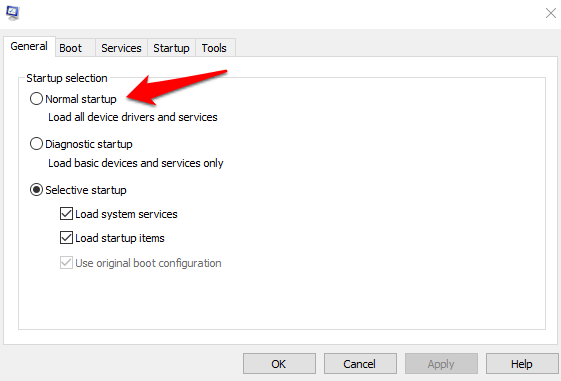
- Under the General tab, change the Startup selection to Normal Startup.
- Click Apply and restart your computer to check if the BITS service starts normally again.
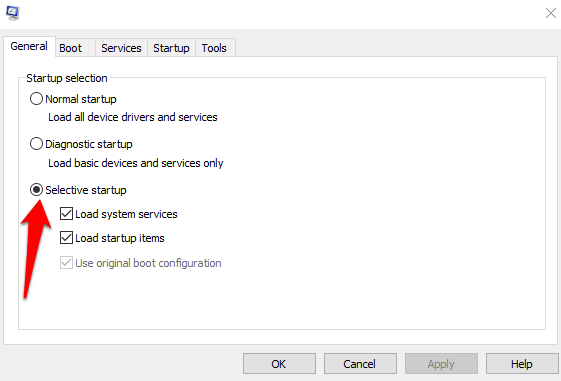
- Go back to the General tab, and click the Selective startup option. Clear the Load startup items checkbox.
Edit The Registry
The Registry Editor requires that you pay careful attention to each step so as to prevent any further issues with your computer. It involves making changes to the registry, so make sure you backup your registry before taking the steps below.
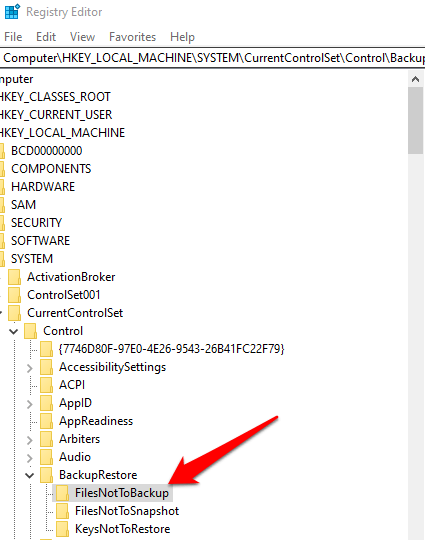
- Right-click Start and select Run. Type regedit in the run dialog box to open the Registry Editor. In the Registry Editor, navigate to this key: HKEY_LOCAL_MACHINE\SYSTEM\CurrentControlSet\Control\BackupRestore\FilesNotToBackup
- Check if the FilesNotToBackup entry exists in the BackupRestore key. If not, create it by clicking on Edit>New>Key in the BackupRestore key. Rename the value to FilesNotToBackup and press Enter. Leave the key empty.
- Go to Windows Services (right click Start>Run>type services.msc>Enter) and find Background Intelligence Transfer Service. Right-click BITS and select Properties.
- If BITS service is started, leave it as is; if it’s stopped, click Start, and ensure the Startup type option in BITS properties is set to Automatic.
Reset Your Computer
If nothing else works, reset your computer as a last resort.
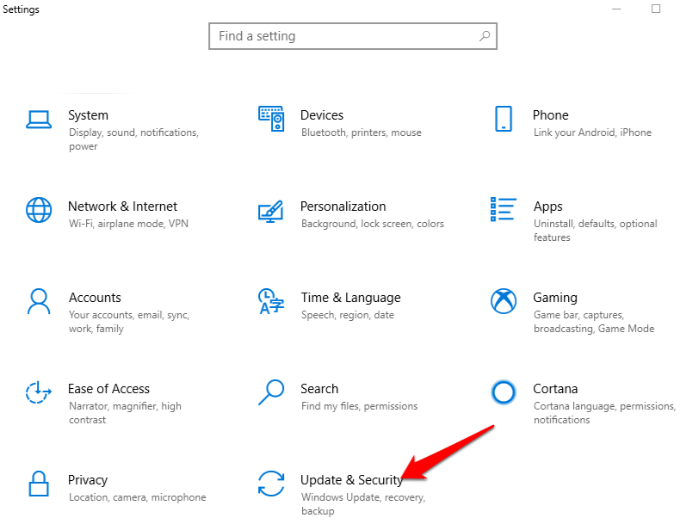
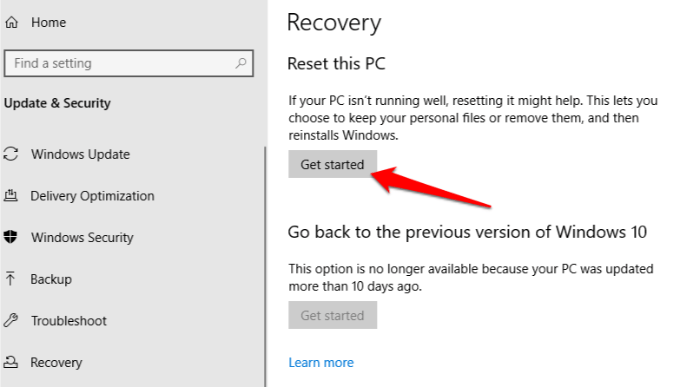
- Open Settings>Update & Security.
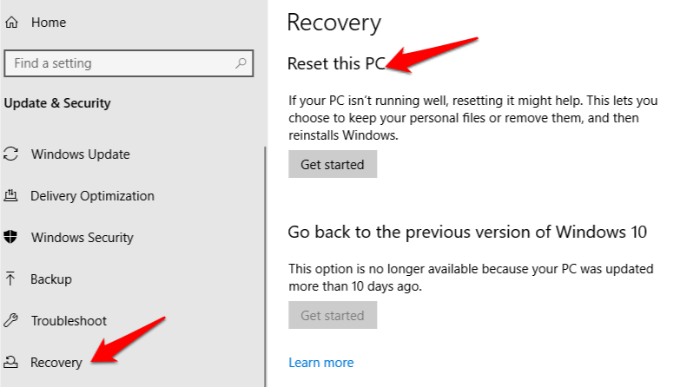
- Click Recovery>Reset this PC.
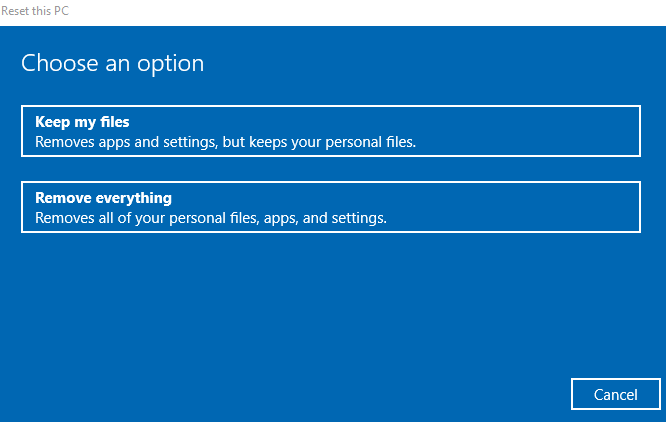
- Click Get Started, and then select Keep my files or Remove everything. All settings will be returned to default and apps uninstalled, so you’re better off going with the Keep my files option.
- Click Next, and select whether you want to keep your files or remove everything. Click Reset and wait for Windows to finish the process. Once it’s done, click Continue, restart the computer and see if BITS works normally again.
- Restart your computer and check if the BITS error is resolved.
![]()
