The good news is that creating an XML sitemap is easier than understanding exactly what it is. And understanding XML sitemaps is fairly simple too. You can do this.
What Is An XML Sitemap?
Let’s cover the XML part first. XML stands for eXtensible Markup Language. It’s not exactly a programming language. It’s a flexible way to tell web browsers and other programs about the data an XML document carries. For example, we could tell someone we live at 123 Main Street and they’d understand. But programs don’t. XML tags placed on either side of the address data will help tell the program what the data means. Tags are always in pairs with one opening tag
and one closing tag . So we could use XML tags to tell programs what that data means. It might look like: For a program that recognizes those tags, it will know that’s a full street address. Then the program can use that information to do something useful. The extensible part means those tags could be anything! If the program understood the tag
to mean street number, it would still work. So a developer could use just about anything to define the data between the XML tags. On to the sitemap. It’s pretty much what it sounds like. It’s a map of where to find different types of information on our website. Search engines, like Google, want specific information so they know how to categorize and rank our site. The XML sitemap can provide that information. This is an example of an XML sitemap for a single web page. Here’s what those tags mean: This one tells the search engine that the XML version we’re using is 1.0 and the text is encoded in UTF-8. That’s the encoding specification that the sitemap must be in. This tells the search engine what sitemap standard is being used in our sitemap. Remember, our XML has to be using the same tags as the program that has to read it for it to understand it. This tells the search engine the information about a Uniform Resource Locator (URL) will be following. A URL is also known as a web address or link. This defines the data in the tag as being the actual location, or specific URL of the page to be indexed. This one tells the search engine when that page was last modified. This lets the search engine know the change frequency of that page. Acceptable values are always hourly, daily, weekly, monthly, yearly, never. This tells the search engine how important we think this page is compared to other pages in our sitemap. Acceptable values range from 0 to 1, with 1 being the highest and 0.5 being average. Note that these aren’t commands for the search engine. They’re going to read that information and process it however they want. Why Create An XML Sitemap?
A well-made XML sitemap will help give us the best chance of getting our site in front of the people we want to see it. It will tell the search engine what kind of information we’re providing it, where to access the information, and when the information was last updated. As it’s a map, it doesn’t have to be an exact representation of the landscape. We get to choose what goes in it, so the search engines get the right pages. For example, our Privacy Policy and Acceptable Use pages aren’t going to be very different from any other site on the web. Instead of mapping those, map the pages that get the user to the good stuff, like our best blog posts or product pages. For the blog posts, we may want a sitemap that lists all your posts but gives a higher priority to more recent ones. That shows the customer, and the search engine, that our site is fresh. Do we need to create a sitemap for the images? Pictures are important. The visual is the first thing that reaches the customer’s desires. But each page is already going to have the pictures on them, and those will get indexed. So having a sitemap just of images isn’t that important. Now we’re presenting the essence of our site to the search engines. They don’t need to waste time crawling and indexing large necessary, but not as important, parts of our site. With a good sitemap, we’re cooperating with the search engines and that will help our site get the best ranking it deserves.
How Do I Create an XML Sitemap?
Fortunately, there are several automated tools to help us do this. If we’re using WordPress, get the Yoast SEO plugin. It’s a great search engine optimization tool and creating a sitemap for us is just one of its features. Take the time to really learn how to use the Yoast SEO plugin for all its features.
Making a Sitemap With Yoast
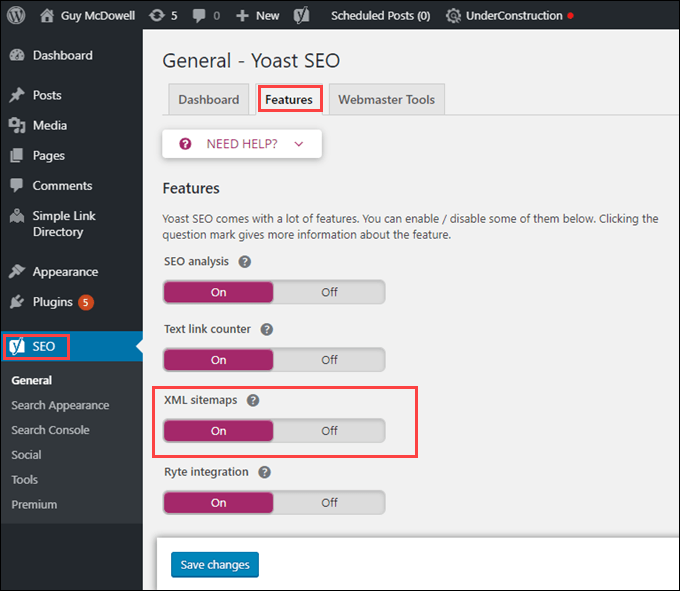
In our WordPress admin page, we’ll install the Yoast SEO plugin. Once installed, we’ll check to make sure that the XML Sitemaps feature is enabled. It should be by default. Click on Yoast SEO in the left side. Then click on the Features tab. Scroll down and ensure that XML Sitemaps has the slider in the On position.
From here, we can see what the sitemap looks like. Click on the question mark icon next to XML Sitemaps and then click on the link See the XML sitemap.
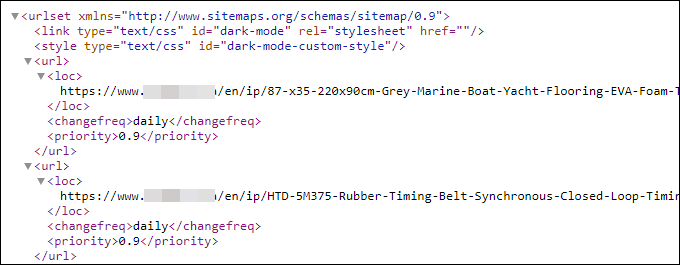
Yoast will open the sitemap in the web browser. It won’t look like the XML we looked at earlier. That’s alright.
If we’d like to see the XML, right click on this page and select View Source. Then the XML is revealed.
That’s the quickest way to create an XML sitemap in WordPress with the Yoast SEO plugin. Take a look around in the plugin for ways to hone the sitemap and make it exactly as needed.
Create an XML Sitemap With Screaming Frog SEO
If we’re not using WordPress for our site, we can use a variety of online and offline tools. Possibly the most used desktop SEO program is Screaming Frog SEO Spider. There’s a free and a paid version. For creating an XML sitemap, the free version is all we’ll need.
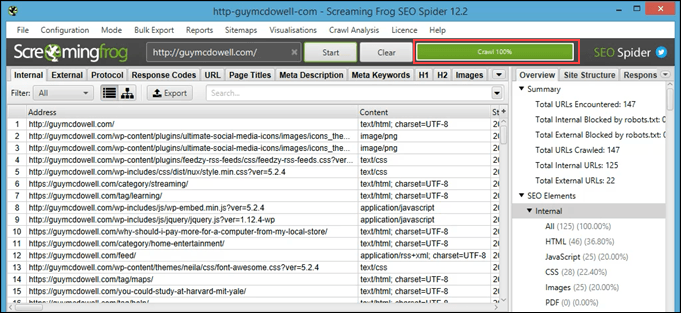
Once it is downloaded and installed, open up the program. Before we can create an XML sitemap, we must crawl the site. Crawling is a process of going from page to page on a site and collecting data about each part.At the top, we see a spot to enter the URL of your website. Do that. Then click on the Start button. Screaming Frog will start crawling the site.
The main window starts to fill with URLs of things on the site. Once the progress bar near the top right of the screen is at 100% the crawl is complete.
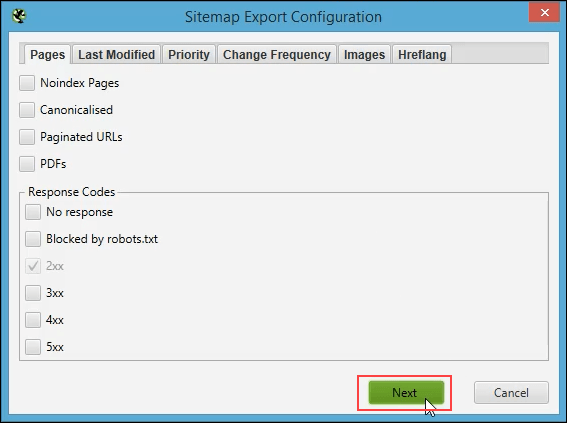
In the toolbar, click on Sitemaps then XML Sitemap. The Sitemap Export Configuration window will open.
The Sitemap Export Configuration window is where we can tweak the details of our sitemap, such as changefreq, lastmod, and others. Go through the tabs to see what’s there. The default settings will do for now. Click Next to begin the export.
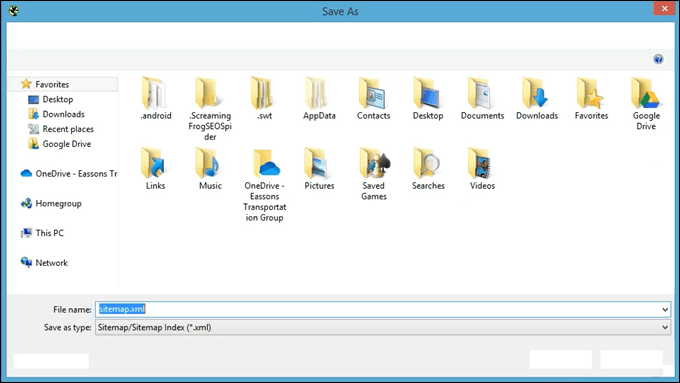
It will ask us where to save the sitemap.xml file. Make sure to remember where It’s saved. We’ll need to upload it to our website for it to be useful.
Once it is saved, upload the sitemap.xml file to the root of the website. Now we can register the sitemap with Google and other search engines.
How Do I Get Google To See My Sitemap?
We say search engines, but really the only one most are worried about is Google. So how do we get Google to see our sitemap? We’re hoping that it’s helpful in getting our site ranked higher, but it will only help if Google knows it is there. We’ll need to use the Google Search Console.
